In this tutorial, we'll show you how to use the Arduino WiFi 101 Shield to send an email from an Arduino using Temboo. The fundamentals shown here apply to any board and wifi shield combination.
This sketch uses our Google > Geocoding > GeocodeByAddress Choreo. You'll also need the Arduino WiFi 101 Shield and a compatible Arduino board.
1Make sure you have a Temboo account. If you don't already have one, you can register for free.
2Make sure that you have the latest version of the Arduino IDE. You should also be sure that you have the newest version of the Temboo Library by checking the Arduino Library Manager.
3Go to the Google > Geocoding > GeocodeByAddress in our Library.
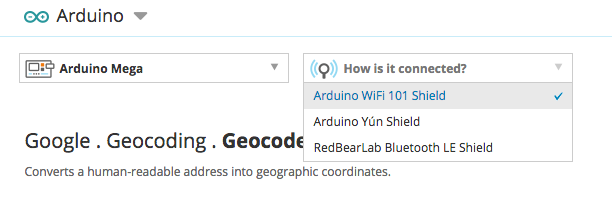
4Select Arduino from the drop down menu at the top of the page, then choose your WiFi 101 Shield compatible Arduino board.
5Select the Arduino WiFi 101 Shield from the "How is it connected?" drop down menu.
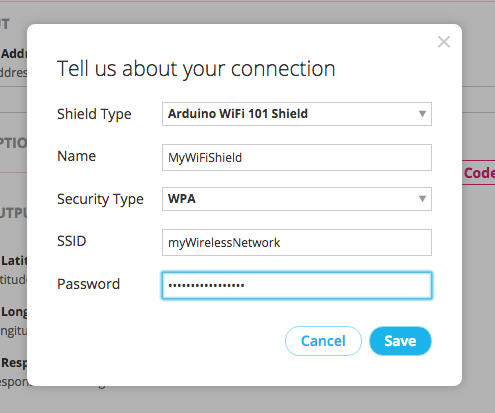
6You'll now see a popup window that prompts you to provide a name, and the type of shield you're using. You'll also need to know the Security settings of your wireless network, the Wireless Network name and wireless network Password. When you press Save, Temboo will add this shield to your profiles so that you can use it later.
7Now that you've set up your shield, you're ready to try the Choreo in the browser. Fill in the required Address input.
8Save the inputs into a profile for the next time you'd like to run this Choreo by clicking Save Profile at the top of the INPUT box. Give your profile a name, and press Save again. Then click the Generate Code button to test the Choreo from our website .
9In the OUTPUT box, you should see the Geocoding information returned by Google in XML format.
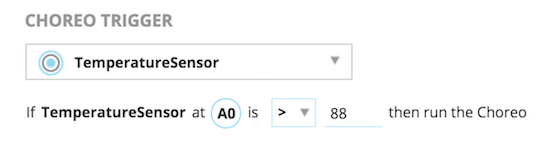
10If you'd like the Choreo to be triggered by a sensor event, or if you'd like the Choreo result to trigger an actuator event, you can configure sensors and actuators on the visual pin board at the top of the page. Then you'll be able to specify conditions above and below the Choreo inputs and we'll generate the application logic code you need.
11Scroll down past the OUTPUT section to the Code snippets. Copy and paste the code snippet into your Arduino IDE.

12You'll also need to create the header file for your sketch, where your Temboo account credentials and shield information are stored. To incorporate it into your sketch, you'll create a New Tab in the Arduino IDE and call it TembooAccount.h.
13Copy the code snippet in the HEADER FILE found directly following the code snippet that you just copied and paste it into the TembooAccount.h tab.

14That's it, now your code is ready to upload! Once you upload the sketch to your board, open the serial monitor and you should see the success message indicating that your email has been sent. If you sent the email to yourself as a test, you should see a new email from your Arduino in your inbox.
Now that you know how to connect your Arduino to Temboo using the Arduino Ethernet shield, you're ready to create a project that uses auto-generated code from any of our 2000+ Choreos. We'd love to hear about what you make - hey@temboo.com.
Once you've got your code up and running, you're ready to move on and do more. From monitoring your running applications, to moving your generated Temboo code to your preferred development environment and sharing it with colleagues, collaborators and friends - we've got you covered.
If you ever need help building your IoT application with Temboo, now or in the future, please don't hesitate to get in touch.
Email us at support@temboo.com and we'll answer your questions.