We'll show you how to make your TI LaunchPad add rows of data to a Google Spreadsheet. You can use your LaunchPad to log data from sensors connected to your board like temperature readings over time, or other instances where your LaunchPad is receiving information that you'd like to record.
This sketch uses our Google > Sheets > AppendValues Choreo.
1Make sure you have a Temboo account. If you don't already have one, you can register for a free account here.
2Since this sketch uses a Google spreadsheet, you'll also need a Google account.
3Login to Google's Developer Console, and create a new Project if you haven't done so already.
4Under the API Manager section, select Library and make sure you've enabled API Access for the Google Sheets API.
5Select Library in the API Manager section, and create a new Client ID specifying Web application for the Application Type.
6When configuring the Consent Screen, make sure you fill out the Email Address and Product Name fields.
7Save the Consent Screen details and specify the callback URL below as the Authorized Redirect URI.
https://ACCOUNT_NAME.temboolive.com/callback/google
8Go to the Google > OAuth > InitializeOAuth Choreo page, and fill in the Client ID from the app you registered at Google and the following Scope: https://www.googleapis.com/auth/spreadsheets Next, click Generate Code to run the Choreo from our site.
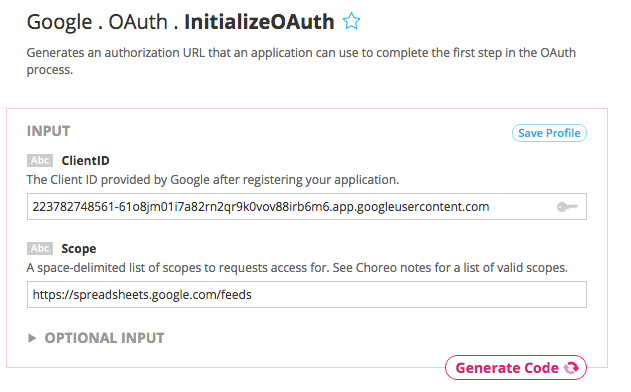
The InitializeOAuth choreo will return an authorization URL and a callback ID (required for the FinalizeOAuth step).
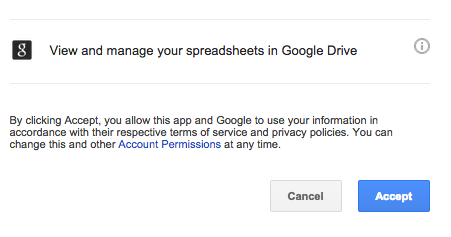
9Open a new web browser, navigate to the authorization URL returned by the InitializeOAuth Choreo, and click "Accept" to grant the app access to your Google account.
10Go to the Google > OAuth > FinalizeOAuth Choreo page, and fill in the callback ID returned earlier by the InitializeOAuth Choreo. Next, click Generate Code to run the Choreo from our site. This process will return a Refresh Token which can be used along with the Client ID and Client Secret to authenticate with Google.
11Create a Google Spreadsheet. In this example our spreadsheet has two columns as seen below: time (in milliseconds) and sensor values.
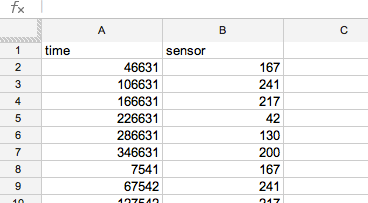
A screenshot of a spreadsheet taking data from a LaunchPad - note the column names
12When viewing your spreadsheet, you'll see a spreadsheet ID in your browser's URL bar. Copy this ID because you'll need it when running the AppendValues Choreo. In the example below, the highlighted part is the Spreadsheet ID.

13Go to the Google > Sheets > AppendValues in our Library.
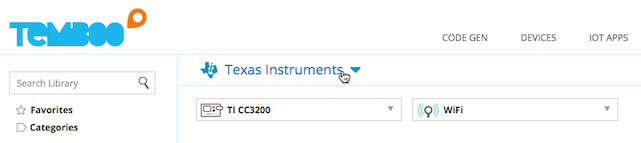
14Select Texas Instruments from the drop down menu, then choose your board. Make sure that you've added details about how your LaunchPad is connected to the internet.
15Fill in the required Choreo inputs, then click Generate Code to test out the Choreo from our website and confirm that your Google Spreadsheet was updated successfully.
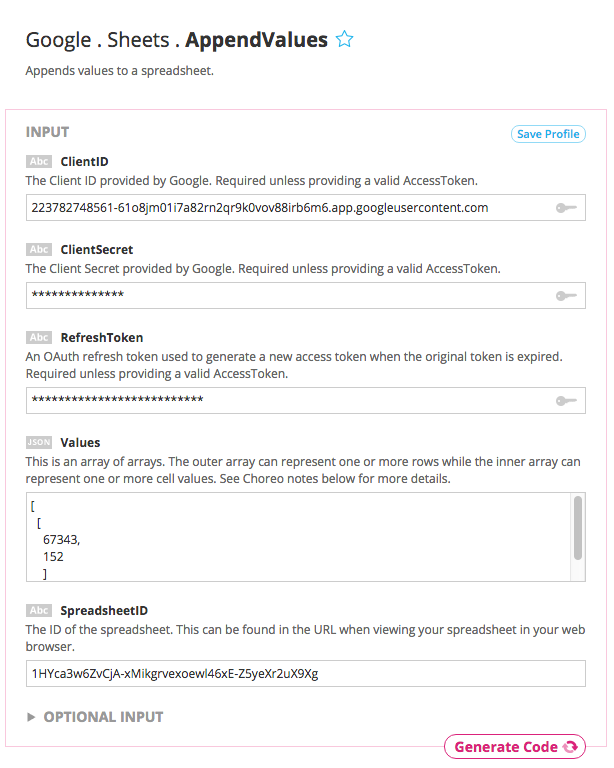
Testing the AppendValues Choreo from our website
16When you've confirmed that the Choreo runs successfully, you can copy the auto-generated LaunchPad code from the Code section and paste it into Energia.
17The auto-generated sketch references the TembooAccount.h header file, which contains your Temboo account information and your network interface details. You'll find the code for this file beneath your generated sketch. Create a new tab in Energia called TembooAccount.h and copy in the header file information.
18The final step before running any sketch is to confirm that you've selected the appropriate board and serial port from Energia. Go to the Tools > Board menu and select the LaunchPad that you're working with. Then go to Tools > Serial Port to select the port your board is connected to.
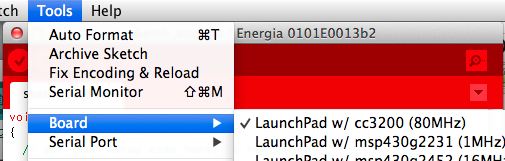
Select your board and port from the Energia Tools dropdown
19With both files in place, you're ready to upload the sketch and start adding data to your spreadsheet. Time to get logging!
You'll notice that your sketch always sends the same hard-coded values to your spreadsheet. Of course, it's far more interesting to send dynamic values i.e., sensor values. We'll show how to add a sensor value and current time to our spreadsheet. Here's an example of what you need to do to make that happen.
20First, we'll want to define the pin, we'll use pin 2, that we're using to read values from our sensor. Before your setup() method, add the following line:
//define the pin you'll be reading sensor data from
const int sensorPin = 2;
21In our setup() method, we should also specify that our sensor pin will be an INPUT by adding the following line:
//set the sensor pin as an Input
pinMode(sensorPin, INPUT);
22At the beginning of your loop() function, create a variable that holds the number of milliseconds that have passed since the sketch has been running.
//get number of milliseconds that have passed since the sketch has been running
unsigned long now = millis();
23We'll now want to read the sensor data coming in from our sensor pin, and plug that data into our rowData variable by adding the following lines after AppendValuesChoreo.begin();.
//read the values coming off of the sensor
unsigned long sensorValue = analogRead(sensorPin);

// convert the time and sensor values to a json array
String rowData = "[[\"" + String(now) + "\", \"" + String(sensorValue) + "\"]]";
24Finally, make sure to pass the rowData to the Values input.
AppendValuesChoreo.addInput("Values", rowData);
25That's it! Now your sketch should be generating dynamic values and adding them to your Google Spreadsheet.
Now that you've mastered working with Google Spreadsheets, why not check out the rest of the 2000+ Choreos in our Library and get inspired for your next project.
We're always happy to help. Just email us at support@temboo.com, and we'll answer your questions.