IoT Mode allows you to easily generate code for a range of embedded hardware. Here we'll walk you through how to use IoT Mode so that you can build your own smart devices. Want a washing machine that texts when the laundry is done? Plants that tell you and Twitter when they need water?
In this example we'll use Temboo to have our Arduino send an email through Gmail. We're using an Arduino Uno with an Arduino Ethernet shield, but the process is the same for any supported board with internet connectivity. If you want to follow along, you'll need an Arduino or Arduino-compatible board and a way to connect it to the internet.
You can learn more about how other supported boards and shields work with Temboo on the Hardware page.
1First, make sure that you have the latest version of the Arduino IDE.
2Next log in to Temboo. If you don't have an account, you can create one for free here.
3You'll also need a Gmail account, which you can create here.
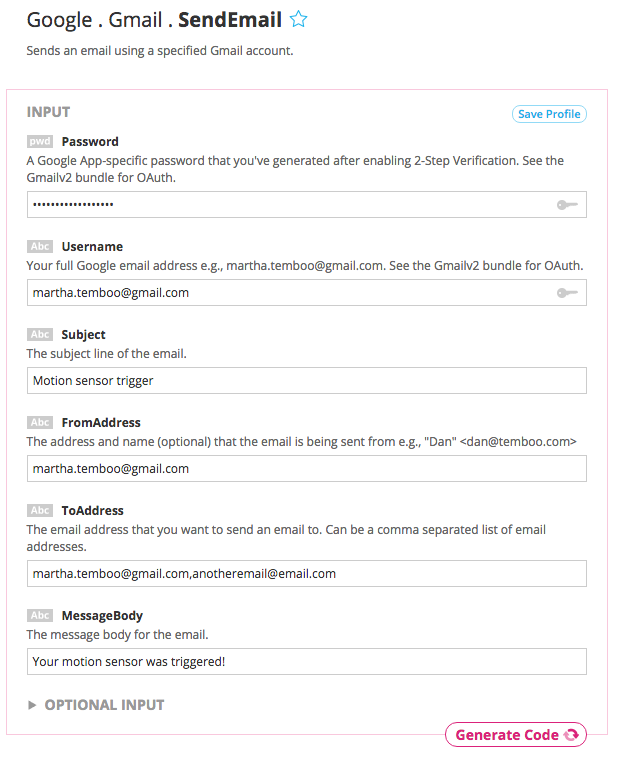
4Go to the Google > Gmail > SendEmail in our Library.
5At the top of the page you'll see the IoT Mode switch. Click to turn on IoT Mode. You'll see that a menu with hardware options has appeared.

6Select the board and how it's connected from the hardware dropdown menus. We're using the Arduino Uno with an Ethernet Shield.
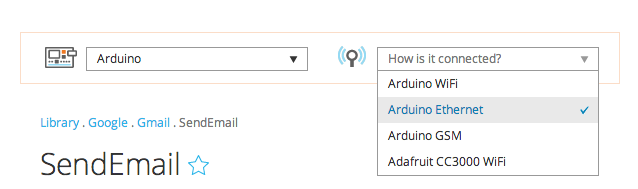
7When the Arduino Ethernet shield is selected, a shield popup window will appear. Name your shield, specify the kind of shield and add the MAC address identifying your shield. You can often find the MAC address by looking at the back of your shield. When you press Save, the shield will be added to your profiles so that you can use it later.
8Fill in the required inputs with your Gmail account details as shown in the screen shot below.
9You should see "success" in the OUTPUT section, and if you sent the email to yourself you should see a new email in your inbox.
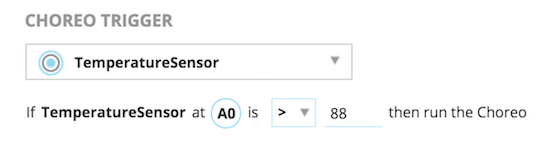
10If you'd like the Choreo to be triggered by a sensor event, or if you'd like the Choreo result to trigger an actuator event, you can specify conditions above and below the Choreo inputs and we'll generate the application logic you need.
11Scroll down the Choreo page to the CODE box. Copy the code snippet and paste it into your Arduino IDE.
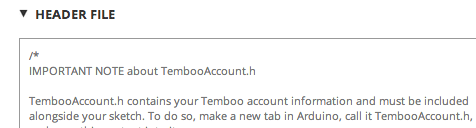
12You'll also need to create the header file for your sketch, where your Temboo account credentials and shield information are stored. Create a New Tab in the Arduino IDE and call it TembooAccount.h.
13Scroll down the page to the HEADER FILE box. Copy and paste it into the TembooAccount.h tab.
14That's it, now your code is ready to upload! Once you upload the sketch to your board, open the serial monitor and you should see the email has been successfully sent. Check your inbox again and you'll see that you've received the second test email.
Now that you know how to use IoT Mode, you're ready to connect your hardware to 2000+ processes in the Temboo cloud. We'd love to hear about your project. Reach out to tell us what you made at hey@temboo.com.
If you ever need help with the IoT Mode, now or in the future, please don't hesitate to get in touch.
Email us at support@temboo.com and we'll answer your questions.