Here we'll show you how to use our Android SDK to upload a file to Dropbox. For this tutorial you will need Android 1.6 (or later) and an Android code editor. We've used Android Studio 0.4.6 for this tutorial, but it will work equally well in whatever IDE you are using.
1Create a new project in Android Studio.
2Download and extract the Temboo Android SDK.
3Add the Temboo SDK to your project:
.jar file (e.g. temboo-android-sdk-core-2.19.0.jar) in the Temboo SDK folder you just downloaded and extracted..jar file, return to Android Studio, and right-click/paste the .jar into the libs folder of your project..jar and select Add as Library. Click OK on the dialog that's displayed.
You've now added the core Temboo SDK to your project. Repeat the above steps to add the application bundle (e.g. Dropbox-2.19.0.jar) from the Temboo SDK folder you just extracted, which will allow us to use Dropbox APIs.
We'll now make some adjustments to the default application that Android Studio has generated for us.
4Open the Android manifest located at app/src/main/res/AndroidManifest.xml. In order to access the internet, you will need to add <uses-permission android:name="android.permission.INTERNET"/> below the <application> tag.
5The default layout of the application included a TextView that we will use, but first, we need to give it an identifier. Locate and double-click on the file app > src > main > res > layout > activity_main.xml. This file describes the layout of our MainActivity class.
6Click on the "Hello World" text in the device emulator to select the TextView.
7In the Properties panel on the bottom-right of the editor, find the id property. Click to the right of it and enter @+id/response
8Next, locate the text property and delete the default "Hello World" value (we'll fill this in programmatically later).
9 Log in to Temboo. If you don't already have an account, you can register for free.
10You'll need a free Dropbox account. If you don't already have one, you can sign up here.
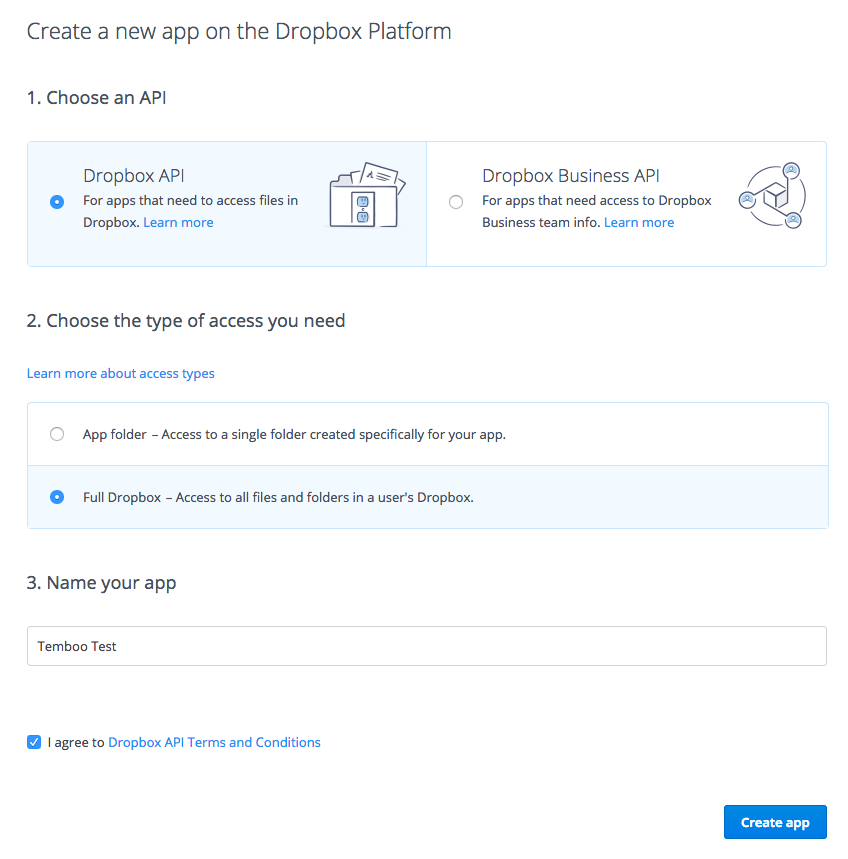
11If you haven't already, create a Dropbox app in the Dropbox App Console.
When asked to choose an API, select Dropbox API. Choose the type of access your application will need: App folder or Full Dropbox. The app name can be whatever you like. When you're done, click Create app.
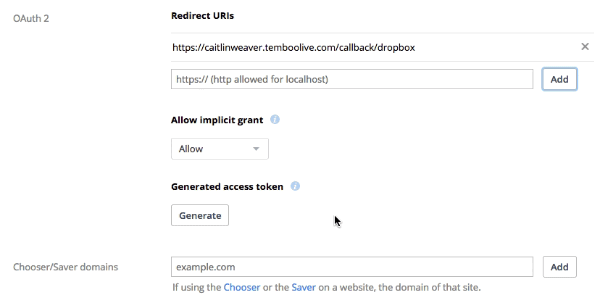
12On the next page, specify the callback URL below as a Redirect URI. Make sure to replace ACCOUNT_NAME with your Temboo account name.
https://ACCOUNT_NAME.temboolive.com/callback/dropbox
13If you will only be needing access to your own account, you can generate an Access Token in the Dropbox App Console. Click the Generate button in the OAuth 2 section of your app settings page.
14In order to access Dropbox accounts other than your own, you will need to complete the OAuth process. If you only need access to your own account, you can skip ahead to the next section.
To begin, go to Dropbox > OAuth > InitializeOAuth in the Temboo code generation library. In the INPUT section of the page, enter the AppKey found on your app settings page within the Dropbox App Console.
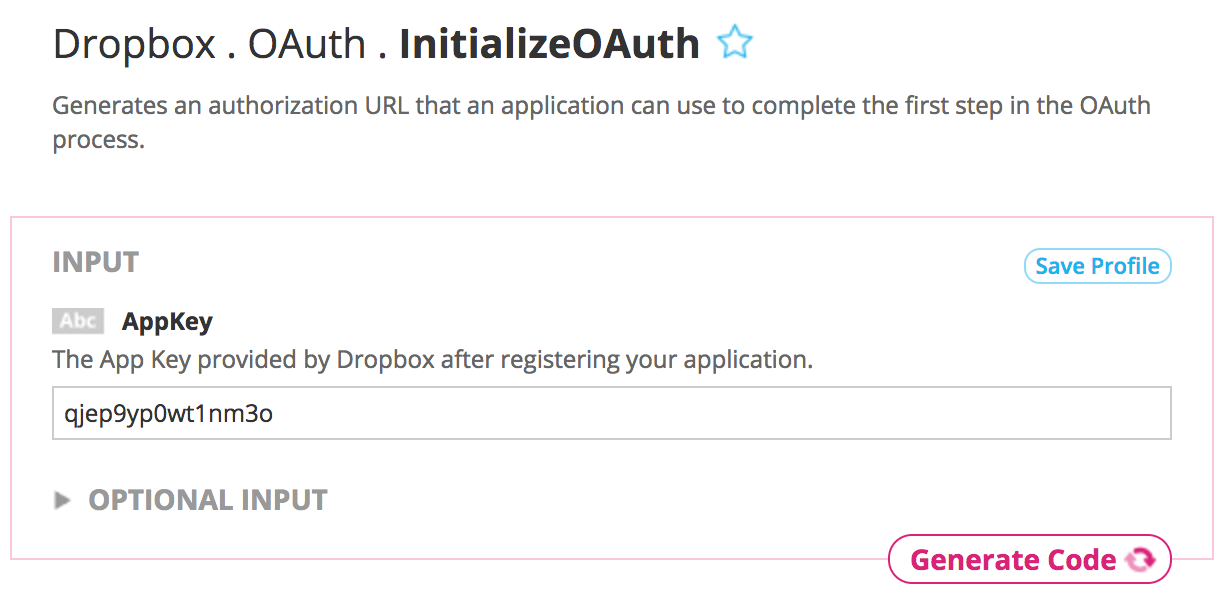
15Click the Generate Code button to run InitializeOAuth from the Temboo site. Scroll down to the OUTPUT section of the page. Save the CallbackID to use in the next steps.
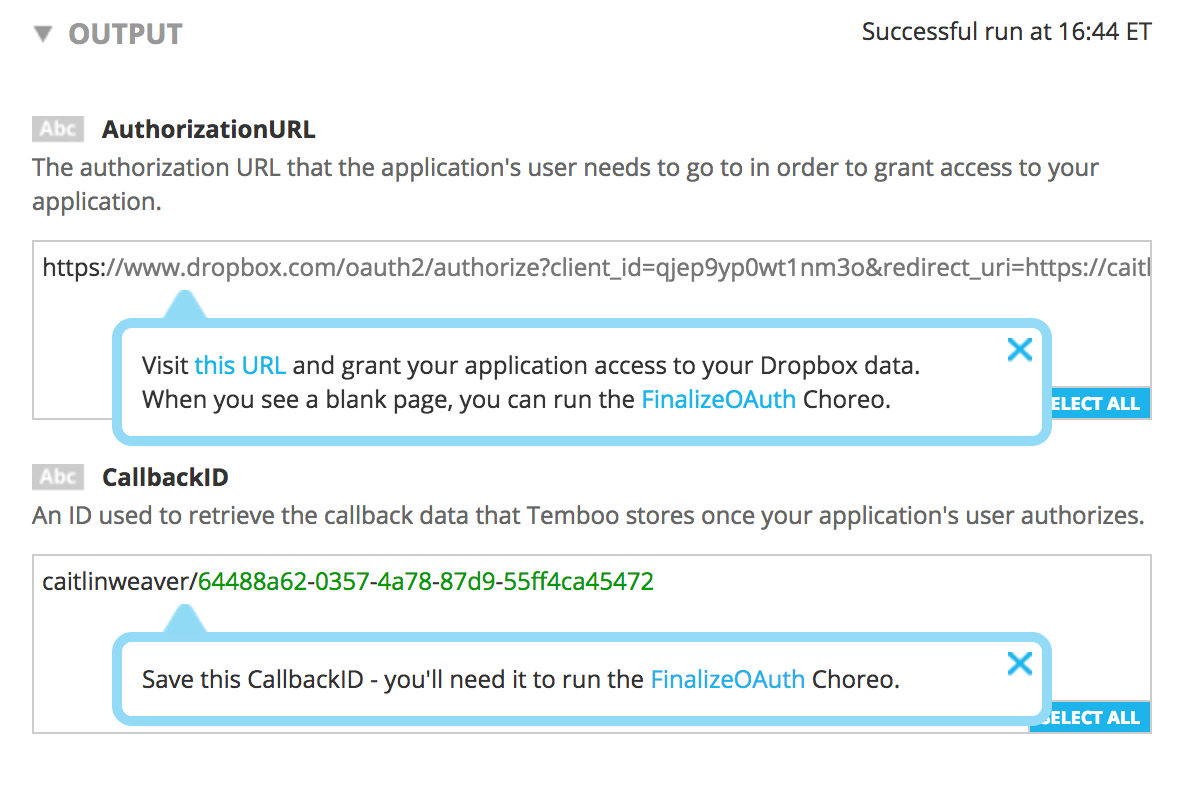
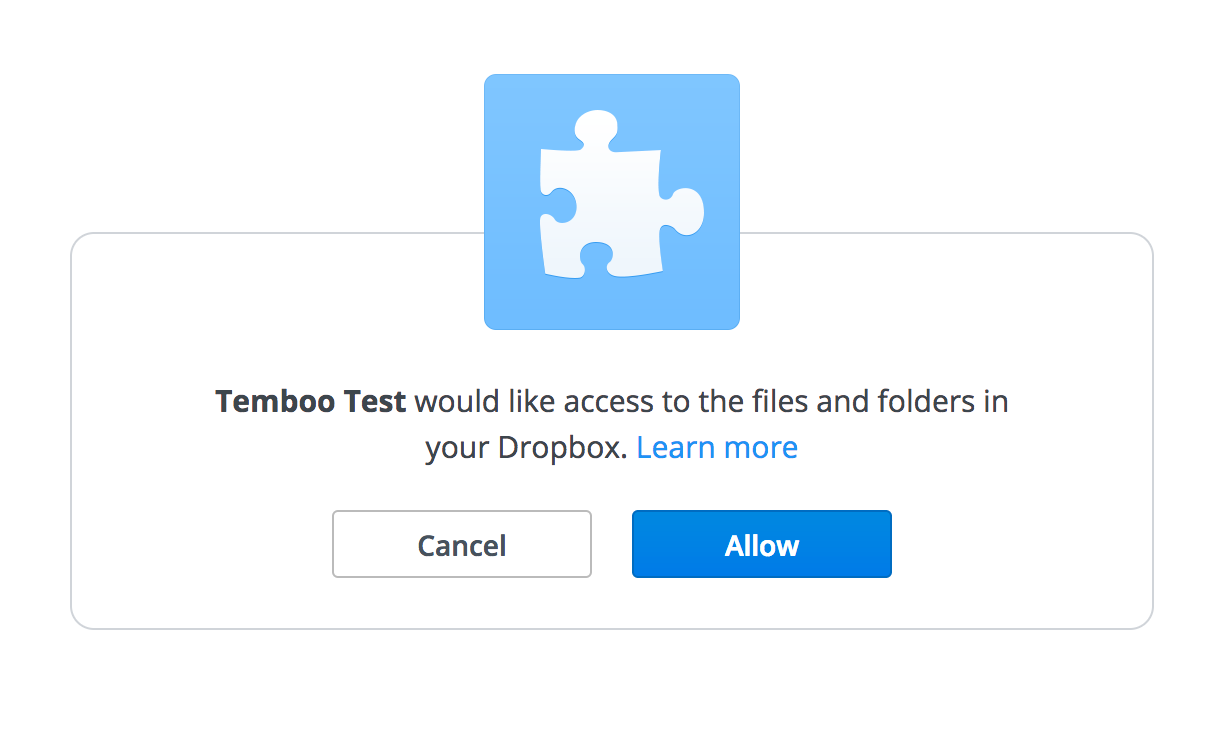
16The owner of the Dropbox account that your application needs to access will need to visit the AuthorizationURL found in the OUTPUT section. They should click the Allow button on the page to grant the application permission to access their account. Once they see a blank page in the browser, it's safe to close the page.
17Once permission has been granted on the AuthorizationURL page, you're ready to complete the OAuth process. Visit Dropbox > OAuth > FinalizeOAuth in the Temboo code generation library. In the INPUT section of the page, enter the AppKey and AppSecret found on your app settings page in the Dropbox App Console.
Supply the CallbackID that was returned in the OUTPUT section of the InitializeOAuth page.
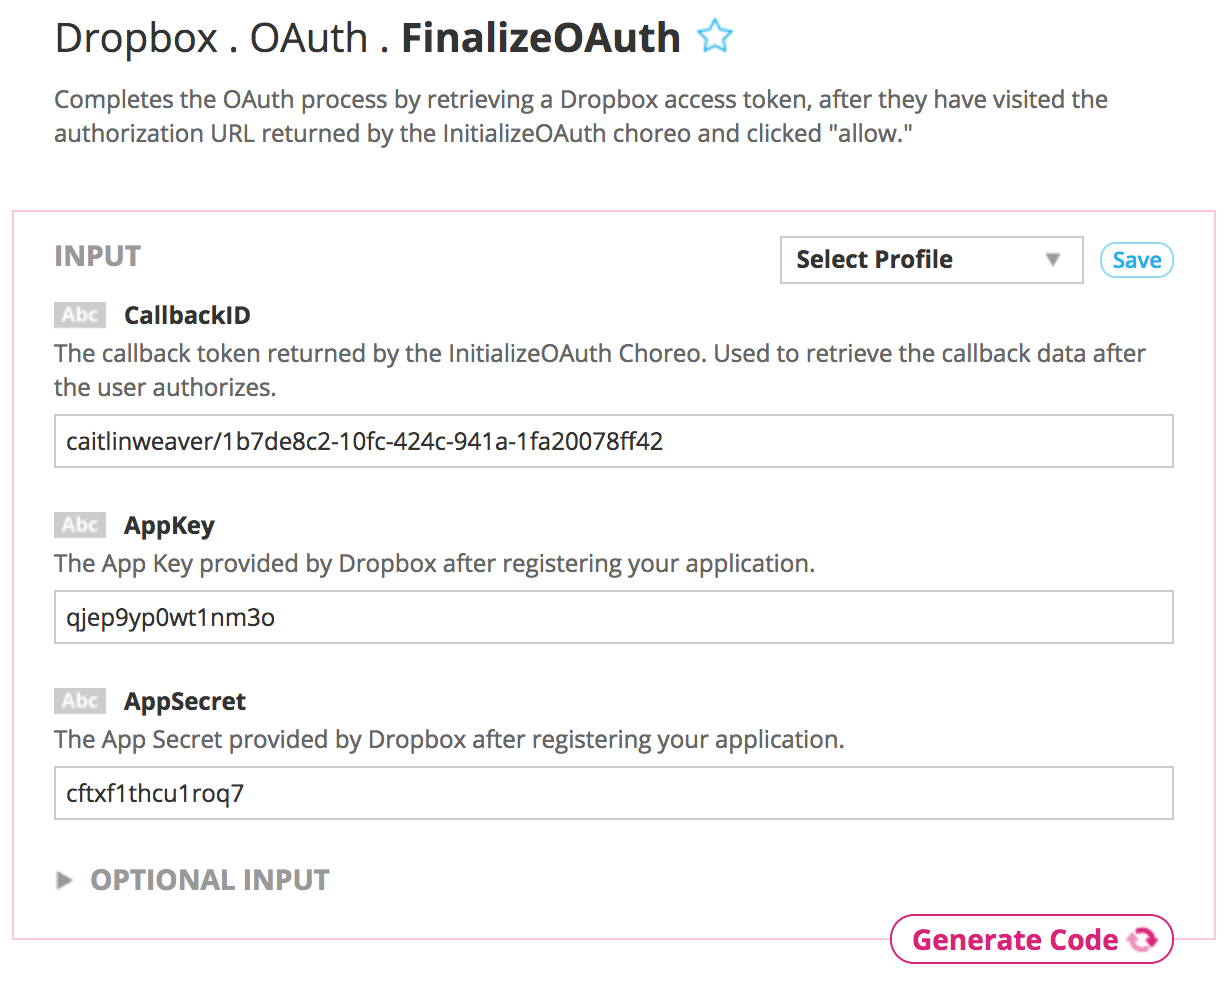
18Now, with all the required inputs in place, click the Generate Code button to run FinalizeOAuth from the Temboo site. Scroll down once again to the OUTPUT section of the page. Here you'll find the AccessToken you'll need for any Dropbox processes for this user's account. Save these it later.

19 Go to the Dropbox > Files > Upload page in our code generation library. From the drop down menu at the top of the page, select Android.
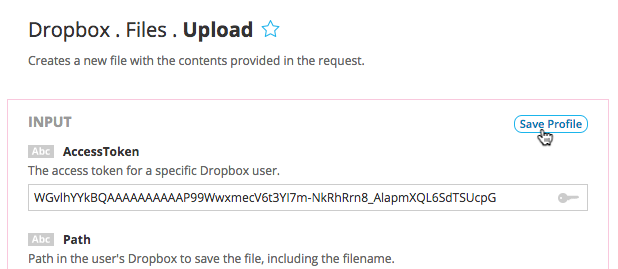
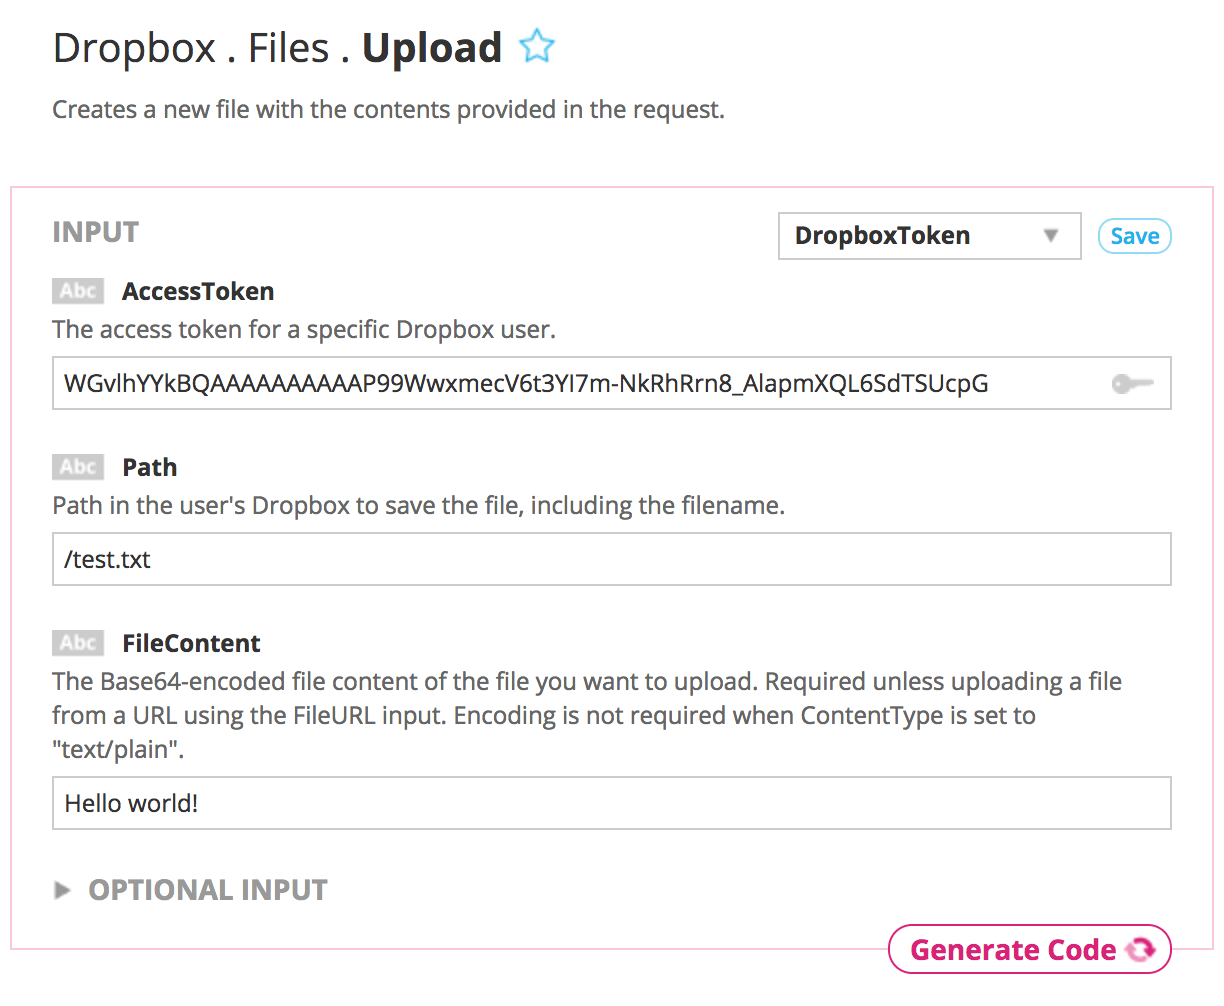
20In the INPUT section of the page, enter your Dropbox AccessToken. Click on Save Profile in the upper right corner of the INPUT section to save your Dropbox credentials for easy use in other Dropbox Choreos in the future. Using a Temboo Profile will also make your code simpler and more secure.
21Enter the file location and filename for your new file in the Path field. To create a text file in the root directory of your Dropbox account, try entering /test.txt for your Path.
22Now supply the FileContent of your text file. We'll just use "Hello world!".
At this point, your INPUT section should look something like this:
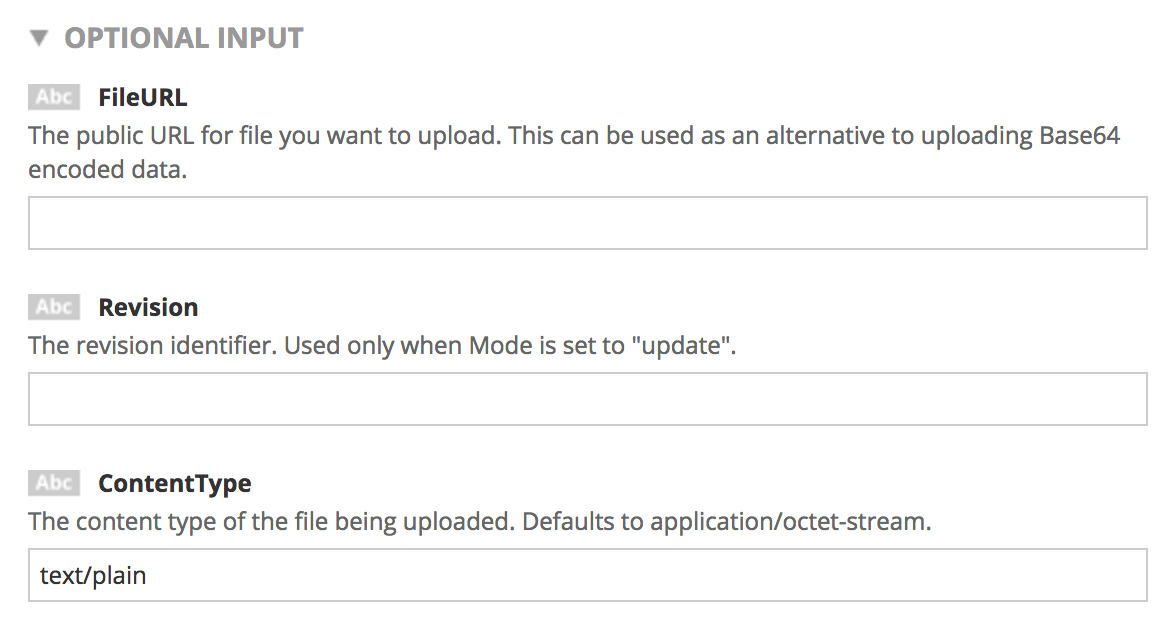
23We need to tell Dropbox that our file content is plain text rather than Base64 encoded binary data. To do so, click on OPTIONAL INPUT at the bottom of the INPUT section to reveal more input fields. In the ContentType field, enter text/plain. You can leave the other fields blank.
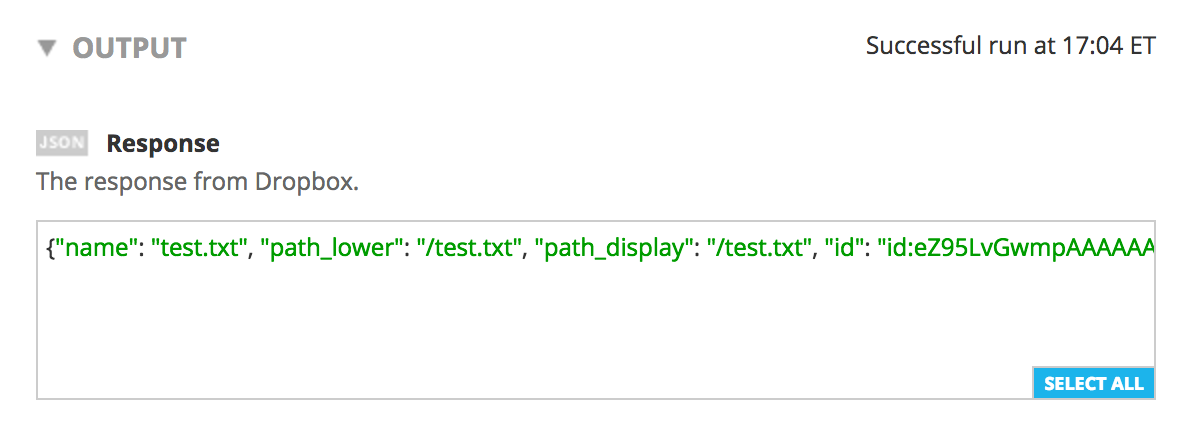
24Click the Generate Code button at the bottom of the INPUT section to test the file upload from the Temboo site. You'll see some details about your uploaded file in the OUTPUT section. If you go to your folder in Dropbox, you'll see your file appear.
25Because network operations block the main thread execution, we'll need to make our calls to Temboo using AsyncTask. Create a new class that extends AsyncTask called "DropboxTask" (or whatever you like), adding the @Override implementations for doInBackground and onProcessComplete.
26Add a constructor that takes a TextView as an argument. This will reference the TextView we set up earlier.
27Now that our AsyncTask is set up, go back to the Temboo website, scroll down to the CODE section and copy and paste the generated code into the doInBackground method of your AsyncTask class. We'll also add the required imports to create a SendMessage Choreo, UploadInputSet, and UploadResultSet:
import com.temboo.Library.Dropbox.Files.Upload;
import com.temboo.Library.Dropbox.Files.UploadInputSet;
import com.temboo.Library.Dropbox.Files.UploadResultSet;
import com.temboo.core.TembooSession;
28Uncomment the line of code containing your Temboo Account credentials, which looks something like this
TembooSession session = new TembooSession(yourAccountName, yourAppName, yourAppKey);
Each Choreo in the Android SDK returns a ResultSet subclass that contains get methods tailored specifically to the outputs of that Choreo. Using the ResultSet, you can retrieve the raw data (typically XML or JSON) returned by a third-party API or relevant fields that we've parsed out of the response for you.
To update the UI with the API response returned by the Choreo, do the following:
29Add the following code at the bottom of the try block of the doInBackground method in your class:
return dropbox_files_upload.get_Response();
30The return value we've just added is passed by Android as an argument to the onPostExecute method. We'll update the UI there:
    protected void onPostExecute(String result) {
        try {
            // Update the UI
            textView.setText(result);
        } catch(Exception e) {
            // if an exception occurred, show an error message
            Log.e(this.getClass().toString(), e.getMessage());
        }
    }
31In order to see your new task in action, you will need to invoke it from the MainActivity class created with your project. The simplest way to do this is to add a call to it in the onCreate method.
32Dropbox won't allow you to upload a file if there's already a file with the location and filename specified in the Path input. Delete your test file in Dropbox so that you can run the same code again from your Android application.
33Deploy and run the application. After a few moments, the application will upload the file and you'll see the response from Dropbox in the UI. If you check your Dropbox account, you'll see a new file uploaded from your Android app.
We're all finished! This Android application can create a text file out of any string you might produce while coding. Check out the rest of the 2000+ Choreos in our Library and discover all sorts of valuable data that you could save to Dropbox.
Once you've got your code up and running, you're ready to move on and do more. From monitoring your running applications, to moving your generated Temboo code to your preferred development environment and sharing it with colleagues, collaborators and friends - we've got you covered.
We're always happy to help. Just email us at support@temboo.com, and we'll answer your questions.