Creating your own Choreos lets you use the power of Temboo in even more ways. You can make Choreos for web services that aren't in our Library yet, chain together multiple API operations into a single Choreo for greater efficiency, or push more functionality onto the Temboo platform in order to free up RAM–ideal for resource-constrained devices like microcontrollers. Here we'll introduce you to the main concepts you need to know in order to get started with building Choreos with Twyla, namely:
Let's begin by building a simple Choreo that makes a request to the Google Directions resource of the Google Maps API.
1Make sure you have a Temboo account. If you don't already have one, you can register for a free account here.
2Download and install Twyla for Mac or Windows. For information about how to obtain the Twyla installer, please contact support@temboo.com
3Launch Twyla, and log in using your Temboo account name, email and password. If you need a reminder of these details, you can find them on your Account Info page.
4In an empty "New Choreo" document, drag an HTTP Request Step from the Steps Palette to the canvas.
5Hover your mouse over the Begin Step which appears on the canvas by default, and drag the "Next" connector to the HTTP Request Step that you just added to the canvas.

Making a connection between the Begin Step and the HTTP Request Step
6Double-click the HTTP Request Step to configure it. In the step property editor that appears, you'll see three tabs that have fields that correspond to the request details. To make a request to the Google Directions API, we'll walk you through these steps:
7On the Server tab of the HTTP Request Step, specify the Google Directions base URL as the URL field . The base URL is:
http://maps.googleapis.com/maps/api/directions/json
8Before jumping right into hard-coding the query parameter names and values in the Request tab, let's define two inputs so that the origin and destination can be passed in dynamically. Go to the Variables Pane, and create a New Local Variable. Give the variable a name, assign the type as String, and enable the check box to define this variable as an input. Do this for both the origin and destination query parameters.
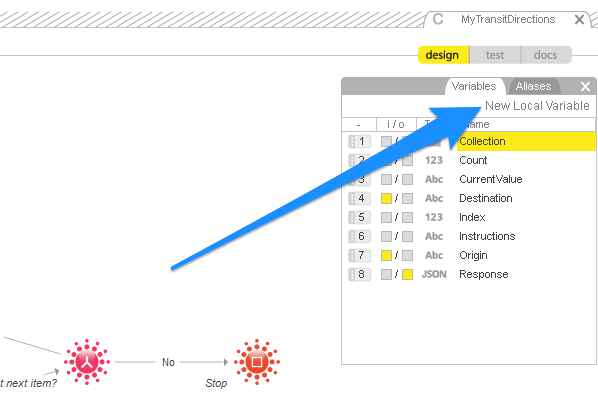
The Variables pane in Twyla
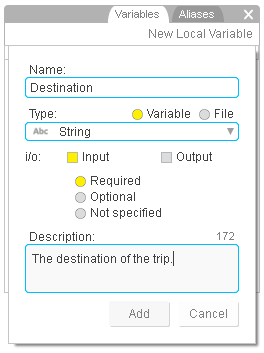
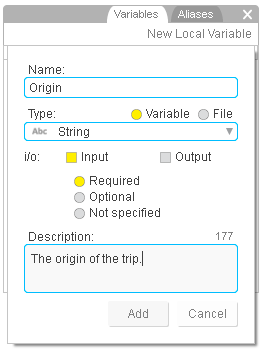
Creating the Origin and Destination variables in Twyla
9Now, we're ready to configure the Request tab and specify the query parameter string portion of this request. You can see a completed version in the screenshot below. Start by specifying "origin" for the first HTTP parameter name, and drag the new Origin input variable from the Variables Pane to the corresponding value field. Follow the same steps to configure the "destination" parameter.
Note: you can find documentation for Twyla's expression language by clicking the quotation mark icon (") beside each value field.
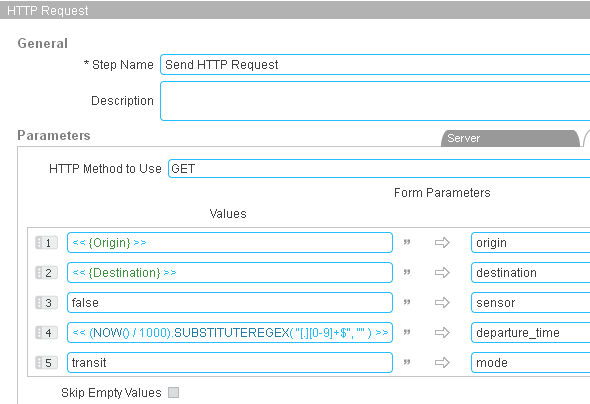
The HTTP Request tab with a completed Google Directions configuration
10Some of the query parameters for this example can just be hard-coded because they won't need to change. Specify "false" for the sensor parameter and "transit" for the mode parameter as above.
11Our last parameter to add is the departure_time, and for this we can use a Temboo expression to generate the current time. The NOW() expression is used to generate the current timestamp in milliseconds. The Google Directions request wants a timestamp in seconds, so we can simply divide by 1000 and trim off the decimal points. This expression using regex should do the trick:
<< (NOW() / 1000).SUBSTITUTEREGEX( "[.][0-9]+$", "" ) >>
12All that's left is to configure an output variable to store the response from Google. Go back the Variables Pane and create a New Local Variable. Give the variable the name Response, assign the type as "JSON", and enable the check box to define this variable as an output. For structured data like a JSON HTTP response, you'll need to select the File radio button. Now you should be able to drag your new output variable to the Store Retrieved Data In field in the Response tab of the HTTP Request step you were editing earlier.
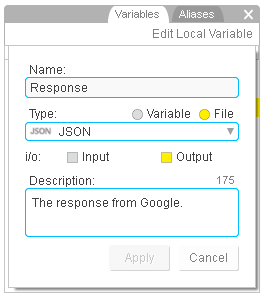
Creating a variable to store the output from your new custom Choreo
13That's all the editing done, so you can save the Choreo now. Click 'Save' and select the Choreos folder as the location to save your new Choreo.
14Click "test" in Twyla's mode selector to switch to the test pane.
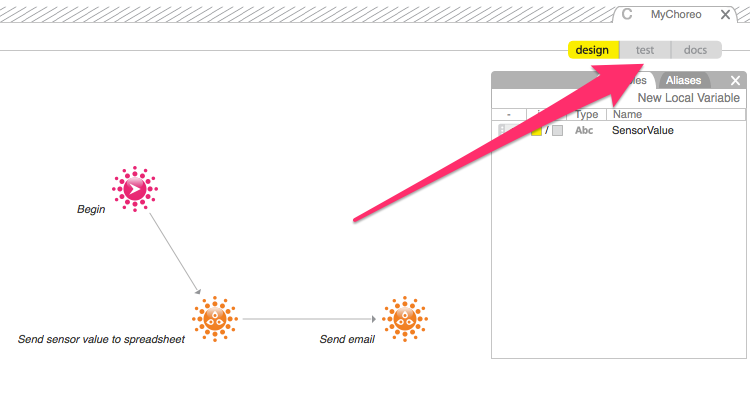
Twyla's mode selector set to Test mode (you can find this above the variables pane)
15Provide values for the Origin and Destination inputs that you've defined, and click the Start button, located above the input fields. For this example, we'll provide these inputs:
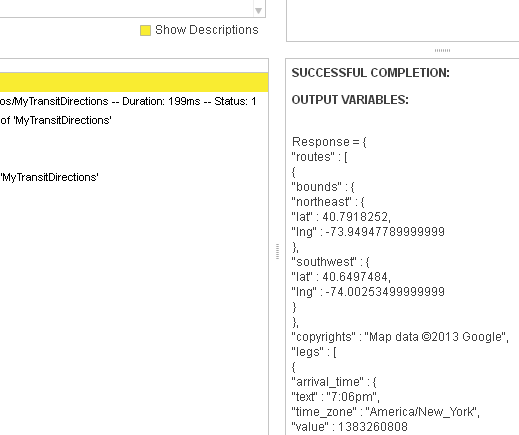
The output you'll see in Twyla when you test run your new custom Choreo
That's it, you're all done. You can build on this tutorial by learning how to work with more complex responses and how to call your new Choreos from your code. You'll find tutorials on those topics and more on the Twyla page.
We're always happy to help. Just email us at support@temboo.com, and we'll answer your questions.