We'll show you how to make your Arduino Yún upload a file to your Dropbox account. Then your Yún can remember everything for you. This sketch uses our Dropbox > Files > Upload Choreo.
1Sign in to your Temboo account. If you don't already have one, you can register for free.
2Make sure that you have the latest version of the Arduino IDE. You should also be sure that you have the newest version of the Temboo Library by checking the Arduino Library Manager.
3Make sure that your Yún is connected to the Internet. Arduino has a helpful guide if you need assistance.
4You'll need a free Dropbox account. If you don't already have one, you can sign up here.
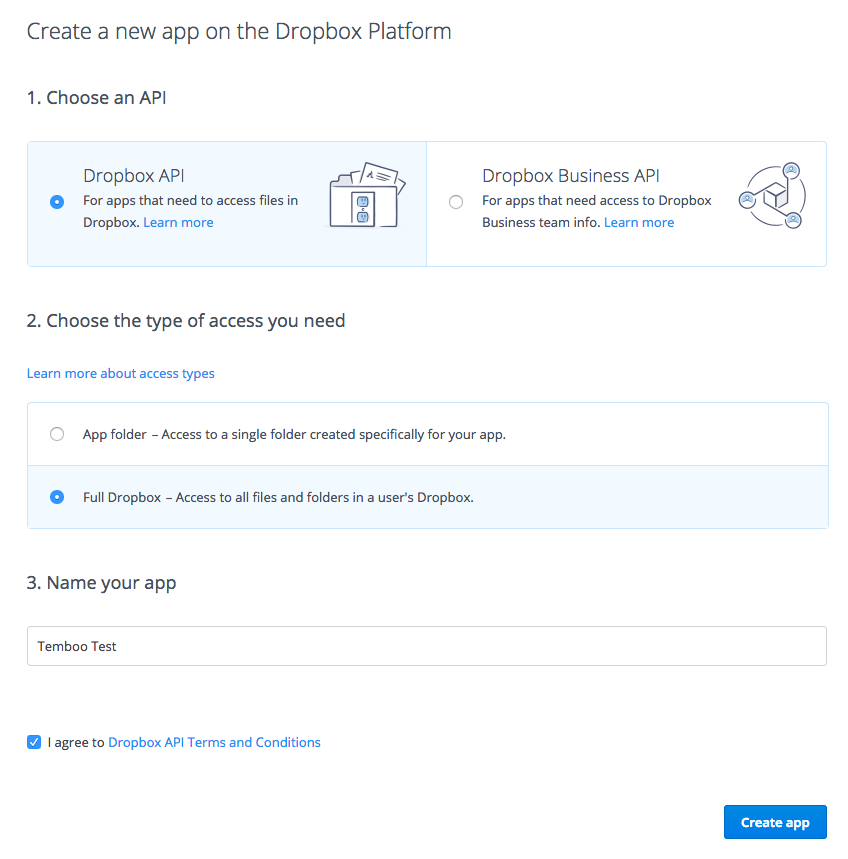
5If you haven't already, create a Dropbox app in the Dropbox App Console.
When asked to choose an API, select Dropbox API. Choose the type of access your application will need: App folder or Full Dropbox. The app name can be whatever you like. When you're done, click Create app.
6On the next page, specify the callback URL below as a Redirect URI. Make sure to replace ACCOUNT_NAME with your Temboo account name.
https://ACCOUNT_NAME.temboolive.com/callback/dropbox
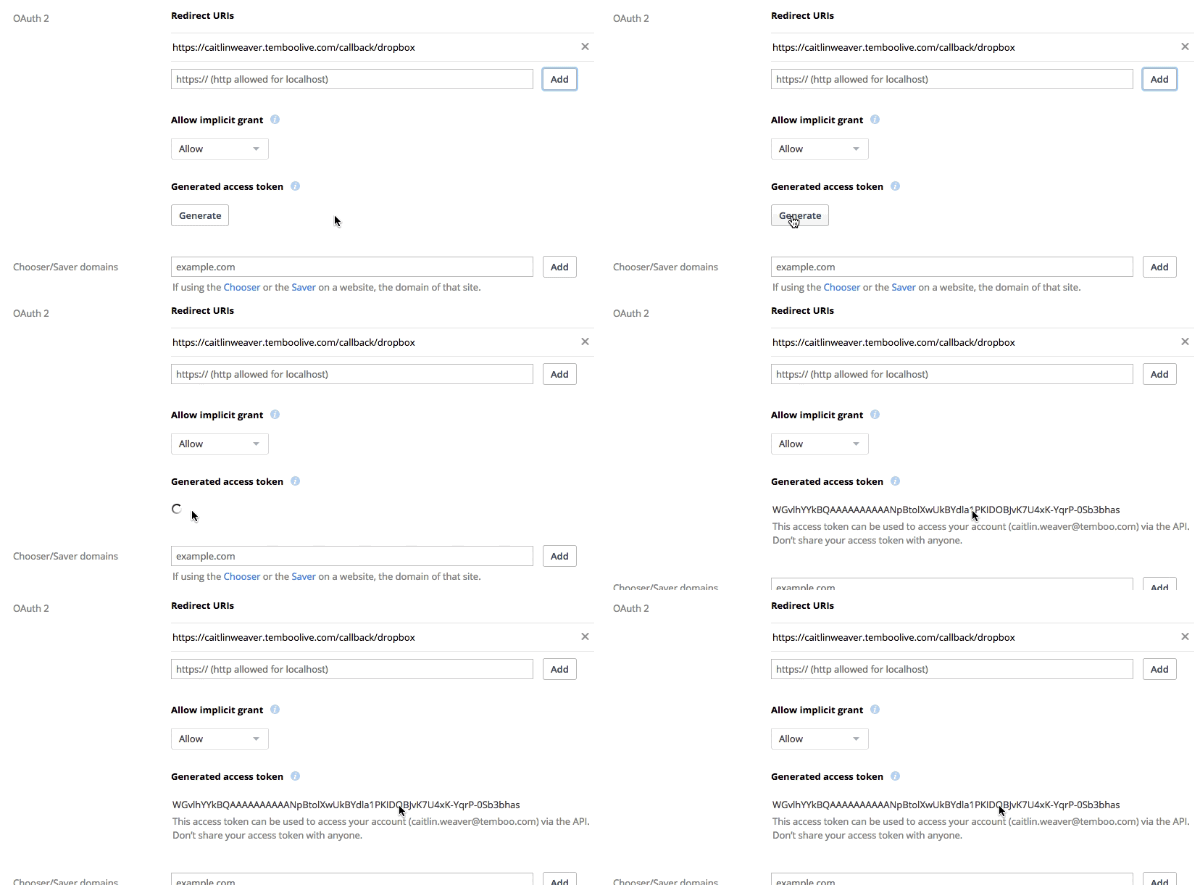
7If you will only be needing access to your own account, you can generate an Access Token in the Dropbox App Console. Click the Generate button in the OAuth 2 section of your app settings page.
8In order to access Dropbox accounts other than your own, you will need to complete the OAuth process. If you only need access to your own account, you can skip ahead to the next section.
To begin, go to Dropbox > OAuth > InitializeOAuth in the Temboo code generation library. In the INPUT section of the page, enter the AppKey found on your app settings page within the Dropbox App Console.
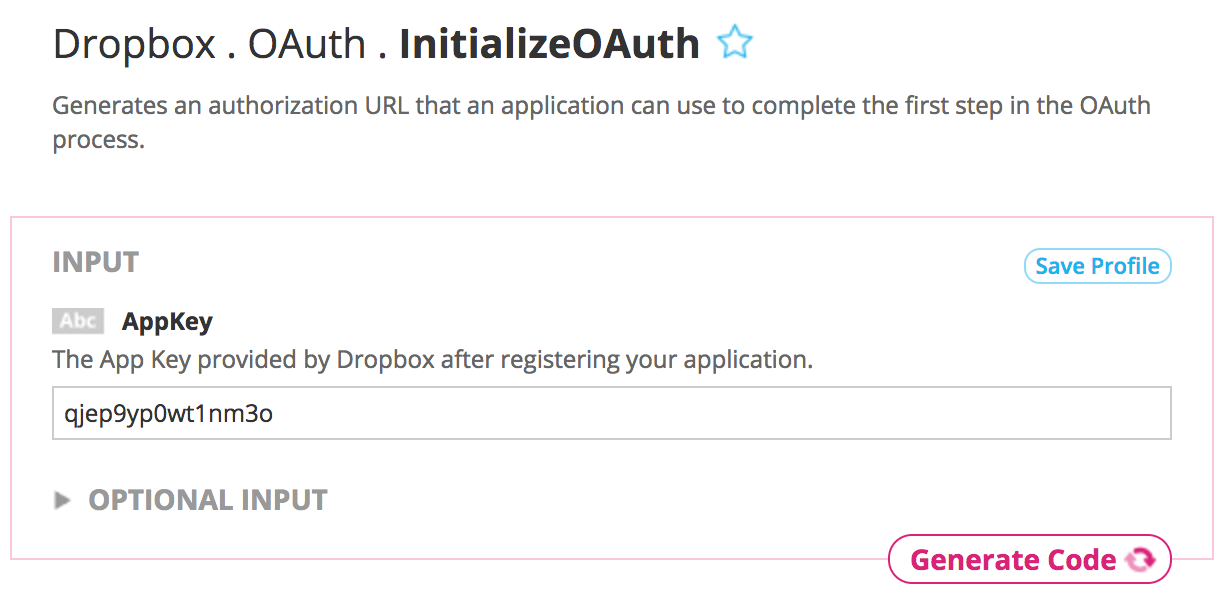
9Click the Generate Code button to run InitializeOAuth from the Temboo site. Scroll down to the OUTPUT section of the page. Save the CallbackID to use in the next steps.
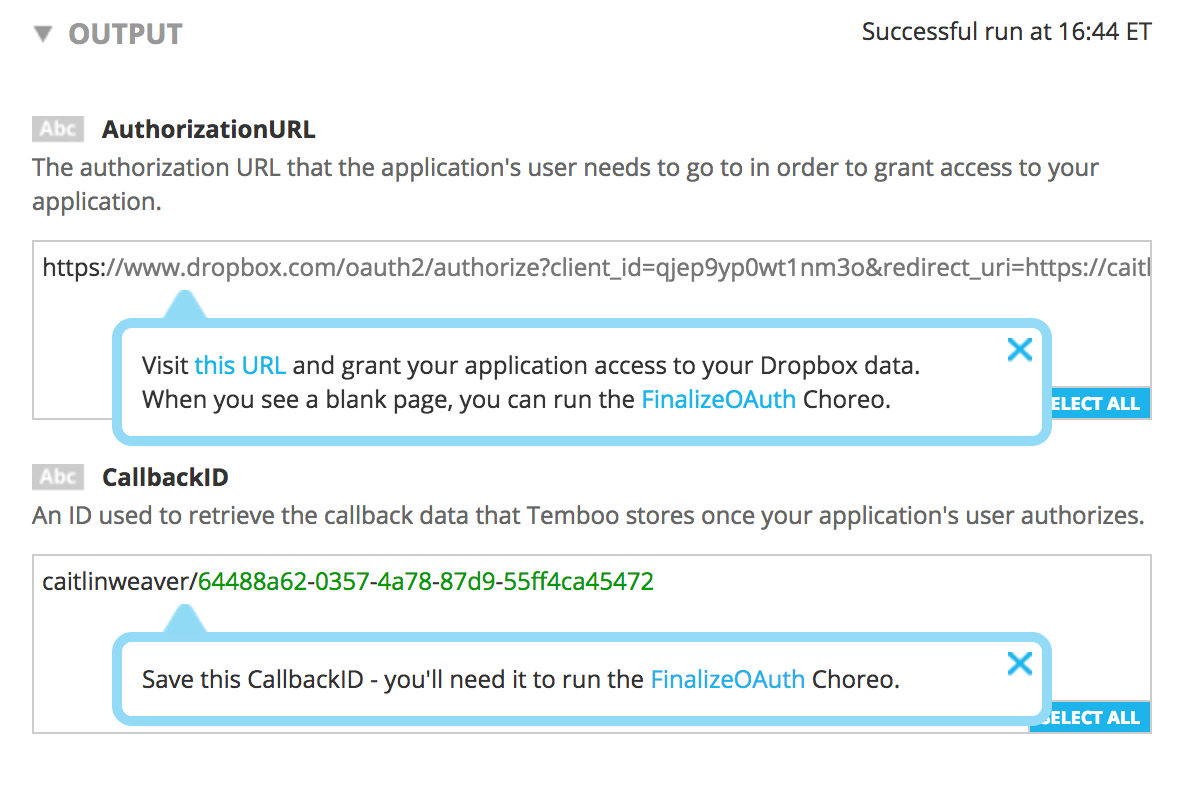
10The owner of the Dropbox account that your application needs to access will need to visit the AuthorizationURL found in the OUTPUT section. They should click the Allow button on the page to grant the application permission to access their account. Once they see a blank page in the browser, it's safe to close the page.
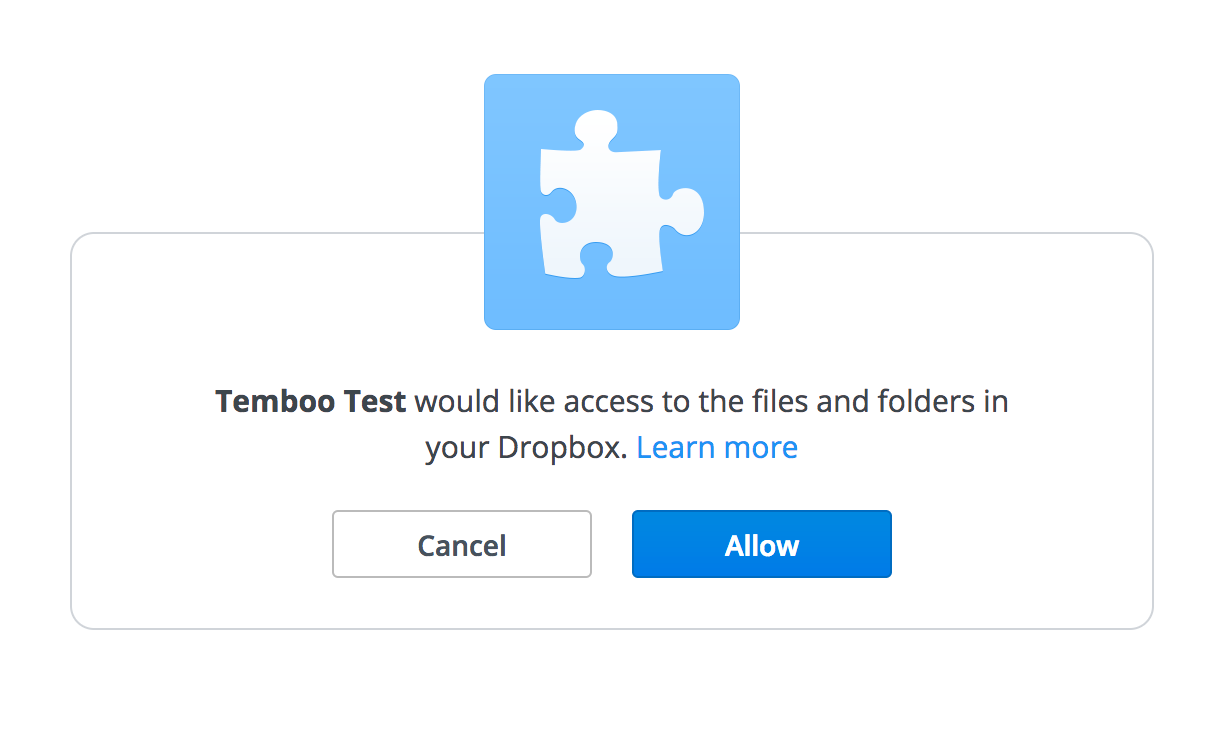
11Once permission has been granted on the AuthorizationURL page, you're ready to complete the OAuth process. Visit Dropbox > OAuth > FinalizeOAuth in the Temboo code generation library. In the INPUT section of the page, enter the AppKey and AppSecret found on your app settings page in the Dropbox App Console.
Supply the CallbackID that was returned in the OUTPUT section of the InitializeOAuth page.
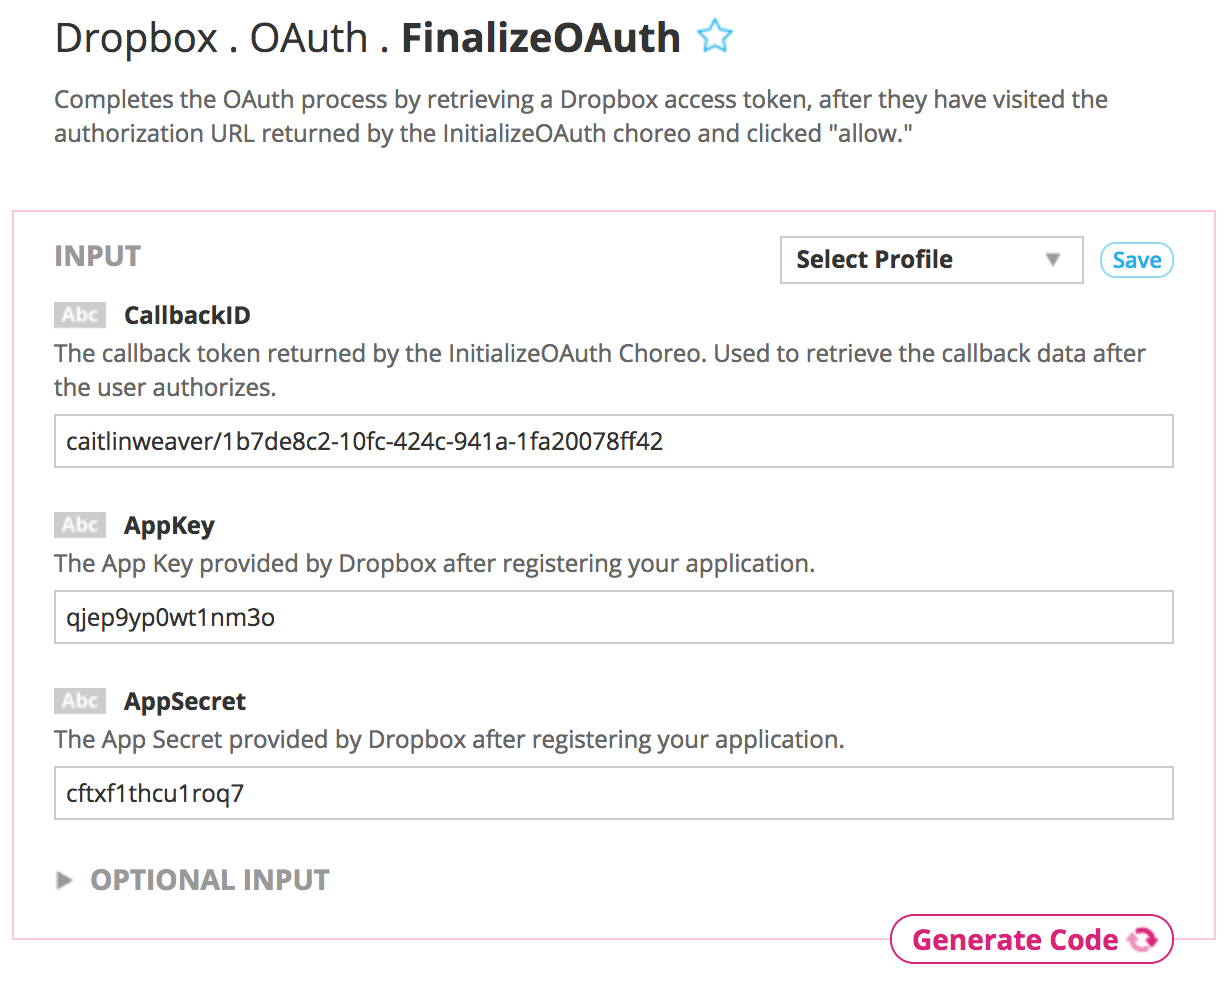
12Now, with all the required inputs in place, click the Generate Code button to run FinalizeOAuth from the Temboo site. Scroll down once again to the OUTPUT section of the page. Here you'll find the AccessToken you'll need for any Dropbox processes for this user's account. Save it for later.
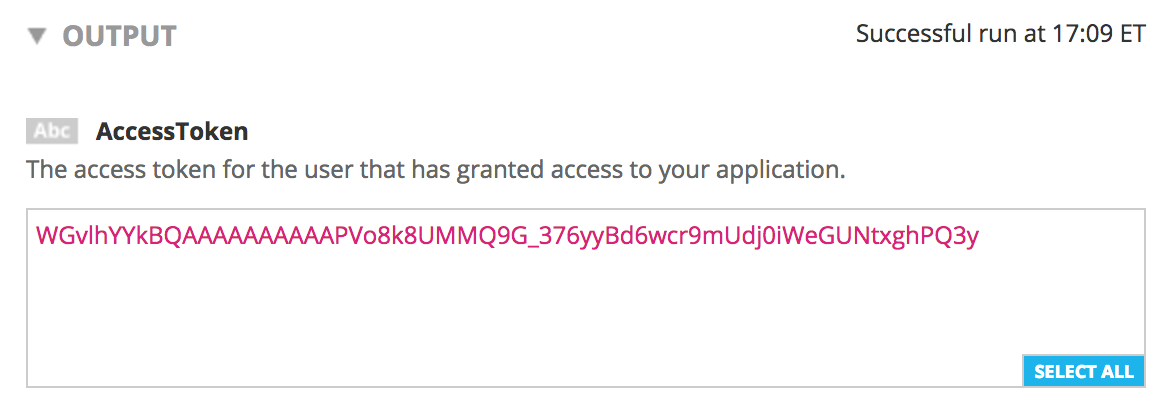
Copy the sketch code below into a new tab in your Arduino IDE. This code calls the UploadFile Choreo, and you will need to replace the placeholder values in the code with your own Dropbox app/OAuth details.
/*
  UploadToDropbox

  Demonstrates uploading a file to Dropbox using the Temboo Arduino Yun SDK.

  This example code is in the public domain.
*/

#include <Bridge.h>
#include <Temboo.h>
#include "TembooAccount.h" // contains Temboo account information, as described below

/*** SUBSTITUTE YOUR ACCESS TOKEN BELOW: ***/

// Note that for additional security and reusability, you could
// use #define statements to specify your Access Token in a .h file.

// Your Dropbox access token. For your own account, this can be
// found in the Dropbox App console. For other accounts, the
// access token is returned by the FinalizeOAuth Choreo
const String DROPBOX_ACCESS_TOKEN = "XXXXXXXXXXXX";

boolean success = false; // a flag to indicate whether we've uploaded the file yet

void setup() {
  Serial.begin(9600);

  // For debugging, wait until the serial console is connected
  delay(4000);
  while(!Serial);
  Bridge.begin();
}

void loop() {
  if (!success) {
    Serial.println("Uploading data to Dropbox...");

    TembooChoreo UploadChoreo;

    // Invoke the Temboo client
    UploadChoreo.begin();

    // Set Temboo account credentials
    UploadChoreo.setAccountName(TEMBOO_ACCOUNT);
    UploadChoreo.setAppKeyName(TEMBOO_APP_KEY_NAME);
    UploadChoreo.setAppKey(TEMBOO_APP_KEY);

    // Set the path and filename of the new file
    UploadChoreo.addInput("Path", "/ArduinoTest.txt");

    // Specify the file content to upload. We're creating a plain text file,
    // but any other type of file must be Base-64 encoded before upload
    UploadChoreo.addInput("FileContent", "Hello, Arduino!");

    // Set the content type as plain text. Any other type of file must be
    // Base-64 encoded before upload.
    UploadChoreo.addInput("ContentType", "text/plain");

    // finally, the Dropbox Access Token defined above
    UploadChoreo.addInput("AccessToken", DROPBOX_ACCESS_TOKEN);

    // Identify the Choreo to run
    UploadChoreo.setChoreo("/Library/Dropbox/Files/Upload");

    // tell the Process to run and wait for the results. The
    // return code (returnCode) will tell us whether the Temboo client
    // was able to send our request to the Temboo servers
    unsigned int returnCode = UploadChoreo.run();

    // a return code of zero (0) means everything worked
    if (returnCode == 0) {
        Serial.println("Success! File uploaded!");
        success = true;
    } else {
      // a non-zero return code means there was an error
      Serial.println("Uh-oh! Something went wrong!");
    }

    // print out the full response to the serial monitor in all
    // cases, just for debugging
    while(UploadChoreo.available()) {
      char c = UploadChoreo.read();
      Serial.print(c);
    }
    UploadChoreo.close();
  }

  Serial.println("Waiting...");
  delay(30000); // wait 30 seconds between Upload attempts
}
The sketch above references the TembooAccount.h header file, which contains your Temboo account information.
If you are currently logged in, you'll see your account details in the code snippet below (otherwise you'll see placeholder values). Copy the code snippet into a new tab in the Arduino IDE and name it TembooAccount.h.
#define TEMBOO_ACCOUNT "ACCOUNT_NAME"  // your Temboo account name
#define TEMBOO_APP_KEY_NAME "APP_NAME"  // your Temboo app key name
#define TEMBOO_APP_KEY  "APP_KEY"  // your Temboo app key
With both files in place you are ready to upload the sketch and send a file to Dropbox from your Yún. Up, upload, and away!
If you're working with the Yún Shield paired with another Arduino board, you'll need to make some small changes to the Yún sketch above it so that it's compatible with the Arduino Yún Shield.
1First, change the include statement #include <Temboo.h> to #include <TembooYunShield.h>. Your include statements should look like this:
#include <Bridge.h>
#include <TembooYunShield.h>
#include "TembooAccount.h"
2Next, change the Temboo object name from TembooChoreo to TembooYunShieldChoreo. Your code should look like this:
TembooYunShieldChoreo UploadFileChoreo;
Now your code is ready to run on your Yún Shield!
Now that your files are safety stored in Dropbox, why not check out the other 2000+ Choreos in our Library and start thinking about all the possibilities for your next Yún project.
We're always happy to help. Just email us at support@temboo.com, and we'll answer your questions.